28 June 2012

DESMOND REGAMASTER EVO 15x6.5 +35

Got a friend of mine to professionally paint them in matt black with matt clear coat.. no more dirty white wheels ;)


My friend's workshop.. (spot the 350Z in the background?)

17 June 2012

Neptune TunerView II regular: Case

Manage to fabricate a case for the TunerView

The CF sticker is cover up my lousy cutting skills. If only I can get someone to CNC a aluminum face plate for this.

The buttons were swapped to smaller ones to save space.


It looks quite ghetto, but at least its better than just showing the PCB.

16 June 2012

Neptune TunerView II regular: S300

Sometimes I would like to know what are the sensors reading and Hondata S300 adjustments or when the car is having erratic behavior, I can have quick check on the parameters.  Usually I would have to hook up my laptop to the ECU and mount the laptop on the dash, which can be troublesome.

Neptune RTP TunerView II Regular Dash Kit
The other solution is the NEPTUNE RTP TunerView II ;).  This kit allows me to monitor all the parameters in the S300 and its easy to install.

The unit dimension is 98mm x 60mm


Before installing, u need to set up the unit by connecting it to the computer. You can download the software from this link: http://www.hrtuning.com/software/index.php?file=TunerView%20II/ .


In the TunerView II setup, select S300 under the system option.


Next u have the prepare the connection cable. The cable that came with the unit requires a little work to it.  You will have to swap the last two wires on the right to be able to use with Hondata.


You will need the HONDATA Module which has to be ordered separately.

Connect the module wires; red to ignition (+12v) and black to ground.

Another thing to note is that the heatsink (The metal piece protruding out of the box) get very hot.  So avoid having that part touching anything when selecting a position to mount it.


Connect the USB cable to the S300.


Connect this cable to the display unit


Note: the TunerView does not comes with a box, so I have to fabricate one.

14 June 2012

SPAL 30102044 Radiator Fan

SPAL radiator fan (30102044 13" puller) made in italy

Tight clearance
I had a Aux fan installed to improve the cooling. But I wanted to reduce the clutter and to have more clearance between the radiator fan and the exhaust manifold.  So I got the SPAL fan which is rated to flow at 1700 CFM to replace both of the fans I had.


Comparing the fans: stock vs SPAL.  Puny stock radiator fan motor vs huge SPAL radiator fan motor.


Do remember to tighten the fan motor before installation.


The 13" SPAL fan sits nicely on the radiator


Less clutter and more clearance!!  Surprisingly, the fan is quieter then the stock fan and the air flow is good too.  The plastic housing feels a lot more durable than the E-bay radiator fan and so is the fan motor housing.   Another thing to note is that it heavy at about 10 lbs/ 4.5 kg.

11 June 2012

Wheels: Desmond RegaMaster EVO


Finally got my hands on these!! +35 offset. Those who are in the know, will understand the meaning of the photographs ;)

10 June 2012

EG K-Tuned Traction Bar Part 3

The K-Tuned control arm mounting tabs fits well onto the front LCA. Its a simple bolt on job.


With the radius bolt on.


 Good clearance for both sides of the traction bar


Take note: Do not tighten the radius rods during initial installations, make sure there is some free play before lowering the car.

After installing the radius rods, I ensured that there is some free play and hand tighten the lock nuts. Then I drove the car for a short distance to make sure the front wheels gets to settle back into their neutral position.

Once that is done, I reached under the car (four wheels down on the ground) and tighten the rod to ensure there is no free play, followed by tightening the locking nut.

Initial verdict: As my ride is on soft suspension setup for daily drive; during high speeds turns, it tends to "wobbles" slightly.  After installing the traction bar, the "wobbles" are eliminated and the car feels more controlled.  All this is before a wheel alignment is done to get the castor corrected!  

As for wheel alignment to adjust the castor, it will be a complicated process. This is because when the castor is adjusted, the camber and toe of the wheels will be affected; So do get it done professionally.

update: 18 Jun 12
1) The traction bar may work with half radiators if use the stock radiator mounting point.
2) The K-tune radiator mount bracket will not allow the Half radiator to mounted in the original position.  The radiator will be offset about 1.5 inch to the cam gears side if using the radiator mount.
3) If u have the integra radiator (full size), which u will likely to have adjusted the original radiator mounts lower then stock position.  Then the traction bar will not fit as the stock radiator mounts will get in the way.
4) Using the K-tune radiator mount bracket it will push the full size radiator 1cm / 0.4 inch higher.  Thus, you have issues closing the bonnet.  Alternatively is to lean the radiator slightly which will facilitate the bonnet closing.
5) Another solution is to weld radiator mount brackets directly onto the traction bar.

09 June 2012

EG K-Tuned Traction Bar Part 2

As per the previous post, my radiator mounts was in the way for the installation of the traction bar.  The mounts were repositioned previous to fit DC2R type radiator.


Radiator Mounts grinded off to make way.


Securing the bar in.


The bar in place!


The radiator mount that came with the bar has of the studs pushing against the radiator bottom.  It might just puncture the radiator in the long run.


I cut a small of my spare fuel hose and slipped it over to prevent the sharp edge puncturing the radiator.


With the traction bar and the radiator mount, it puts my KOYO DC2 radiator at about 5mm higher.  I had issues with closing the bonnet. For now, the radiator is slightly tilted towards engine to have more clearance from the bonnet.

05 June 2012

EG K-Tuned Traction Bar Part 1


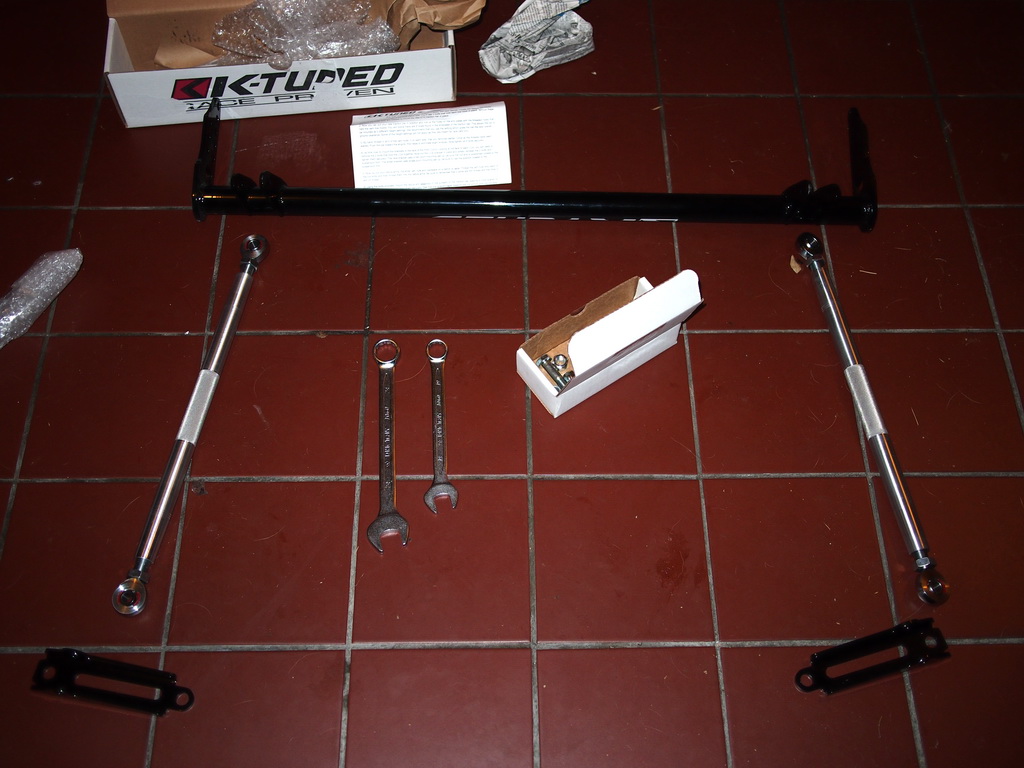
Got my K-Tuned traction bar for the EG today. I ran into some issues when trying to install it.

Apparently the bar was too high and my radiator mount was in the way.


Since the radiator mount is in the way, the bolt holes could not align. It is about 0.5 inch off.


The distance from the top of the bar to the top mounting hole is about 5.25 inch.  It would have cleared if it was at least 5.75 inch. Something to take note if you want a traction bar that bolts right on.


In my case, I will have to cut the stock radiator mount off and use the "adjustable" radiator mount that came with the kit.(This was originally meant for K-swap EGs to relocate the radiator).

I only hard couple of hours to do this, so I have to put it off till the weekend..


Some comments about the K-tuned traction bar.
 The welding isn't fantastic. You can still see visible signs of splatter and the welding seems to be done by some amateur welder..


These tabs are only welded on one side instead of both side.


However, the rest of the supplied items like the double rod end (heim joints) on each end of the radius arm and powder coating seems to be good quality stuff.

I am just pissed that the it interfere with stock rad points so I will be required to cut them off..